Pythonで画像処理してみたいです。
このような要望にお応えします。
今回は、モノクロ画像に自然な色付けを自動的に行うことができるDeOldifyを利用します。
下記のサイトを参考にさせていただきました。
- https://github.com/jantic/DeOldify
- https://blog.shikoan.com/sagan-self-attention/
- http://urusulambda.com/2018/07/15/saganself-attention-generative-adversarial-networkのself-attention機構をざっくり理解した/
- https://qiita.com/shionhonda/items/330c9fdf78e62db3402b
- https://gigazine.net/news/20181105-deoldify-colorize-image/
DeOldifyについて
DeOldifyは、SAGANモデルが用いられています。SAGAN(SelfAttentionGAN)については、以下の記事がよいと思いました。
- http://urusulambda.com/2018/07/15/saganself-attention-generative-adversarial-networkのself-attention機構をざっくり理解した/
- https://blog.shikoan.com/sagan-self-attention/
- https://qiita.com/shionhonda/items/330c9fdf78e62db3402b
今回は、下記で公開されているライブラリを用いてモノクロ画像の自動色付けをします。
GitHub – jantic/DeOldify: A Deep Learning based project for colorizing and restoring old images
- https://github.com/jantic/DeOldify
Google Colaboratoryの準備
・Googleのアカウントを作成します。
・Googleドライブにアクセスし、「新規」→「その他」から「Google Colaboratory」の順でクリックします。そうすると、Colaboratoryが起動します。
・Colaboratoryが起動したら、以下のコマンドをCoalboratoryのセルに入力し実行します。
そうすることで、Googleドライブをマウントします。
|
1 2 |
from google.colab import drive drive.mount('/content/drive') |
・実行後、認証コードの入力が促されます。このとき、「Go to this URL in a browser」が指しているURLにアクセスしgoogleアカウントを選択すると、認証コードが表示されますので、それをコピーしenterを押します。これでGoogleドライブのマウントが完了します。
DeOldifyの準備
Google Colaboratoryの「ランタイム」→「ランタイムのタイプ変更」でGPUを選択します。
ツールをダウンロードする場所に移動します。
本記事では、マイドライブにダウンロードします。
|
1 |
cd /content/drive/My Drive |
gitからツールをダウンロードします。
|
1 |
!git clone https://github.com/jantic/DeOldify DeOldify |
ダウンロードしたDeOldifyまで移動します。
|
1 |
cd DeOldify |
GPUの確認をします。
|
1 2 3 4 5 6 7 8 9 10 11 |
#NOTE: This must be the first call in order to work properly! from deoldify import device from deoldify.device_id import DeviceId #choices: CPU, GPU0...GPU7 device.set(device=DeviceId.GPU0) import torch if not torch.cuda.is_available(): print('GPU not available.') |
ライブラリ実行に必要なライブラリをインストールします。
|
1 |
!pip install -r colab_requirements.txt |
ツール実行に必要なライブラリをimportします。
|
1 2 |
import fastai from deoldify.visualize import * |
modelsフォルダを作成し、モデルデータを取得します。
|
1 2 |
!mkdir 'models' !wget https://www.dropbox.com/s/zkehq1uwahhbc2o/ColorizeArtistic_gen.pth?dl=0 -O ./models/ColorizeArtistic_gen.pth |
サンプル画像を取得します。
|
1 |
!wget https://media.githubusercontent.com/media/jantic/DeOldify/master/resource_images/watermark.png -O ./resource_images/watermark.png |
モノクロ画像に色付けします。
|
1 2 3 4 5 6 7 8 9 |
import glob colorizer = get_image_colorizer(artistic=True) files = glob.glob('test_images/*.jpg') for file in files: colorizer.plot_transformed_image(file, render_factor=20, figsize=(8,8)) |
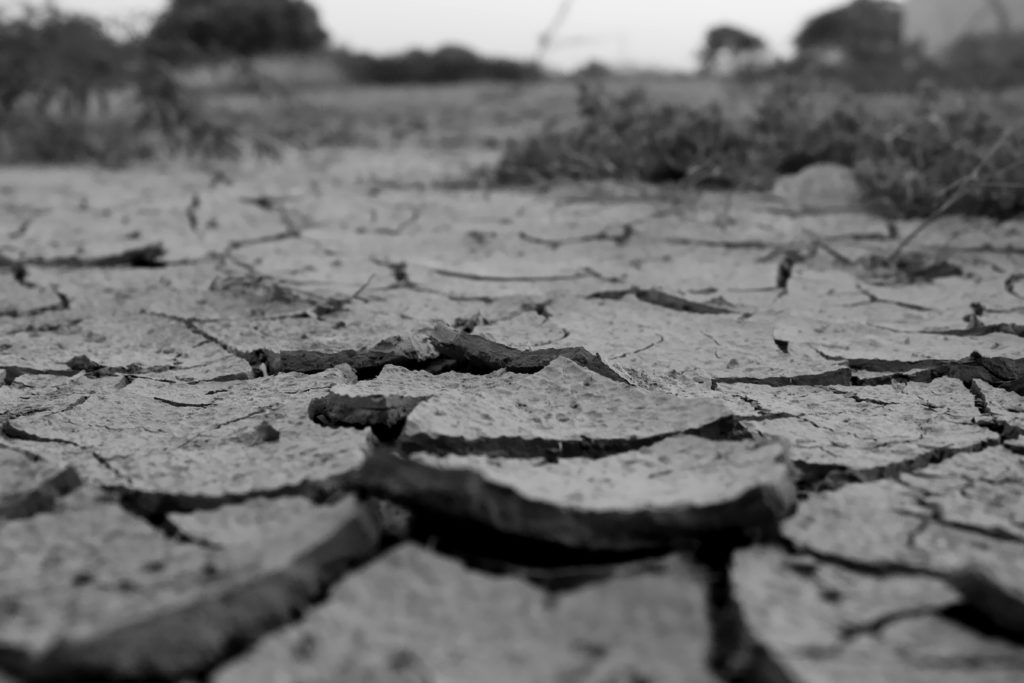
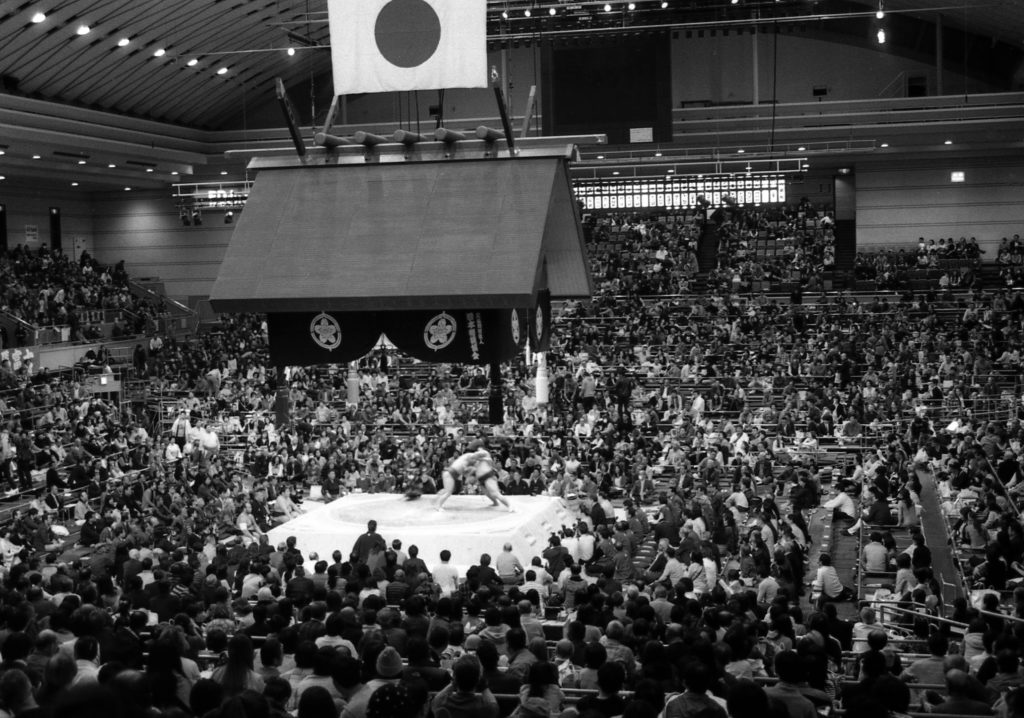
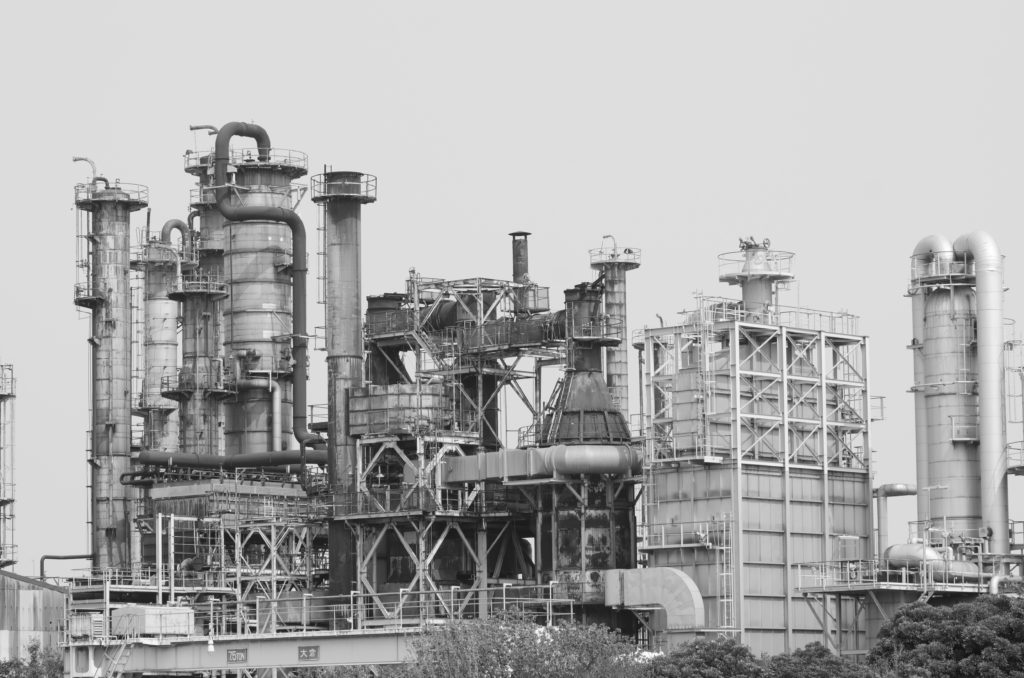
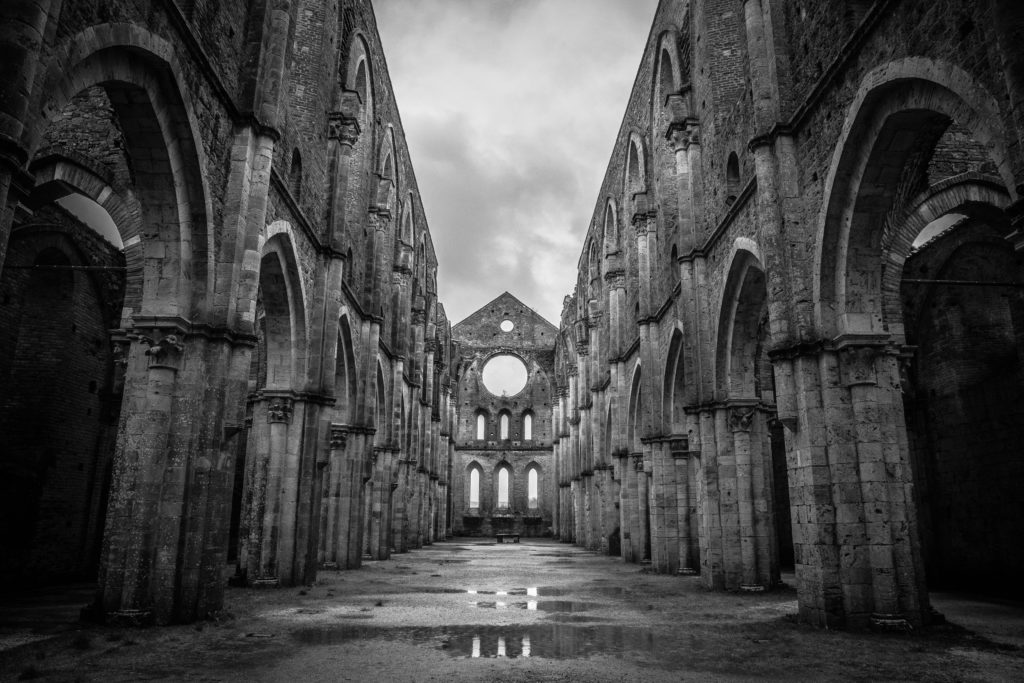
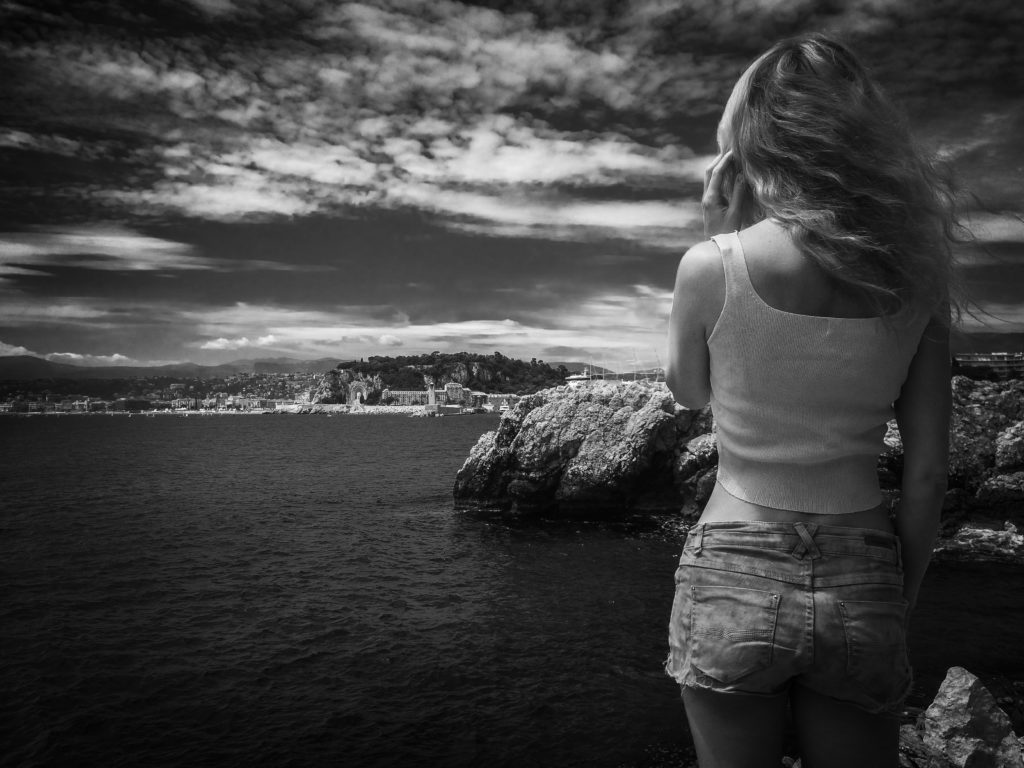
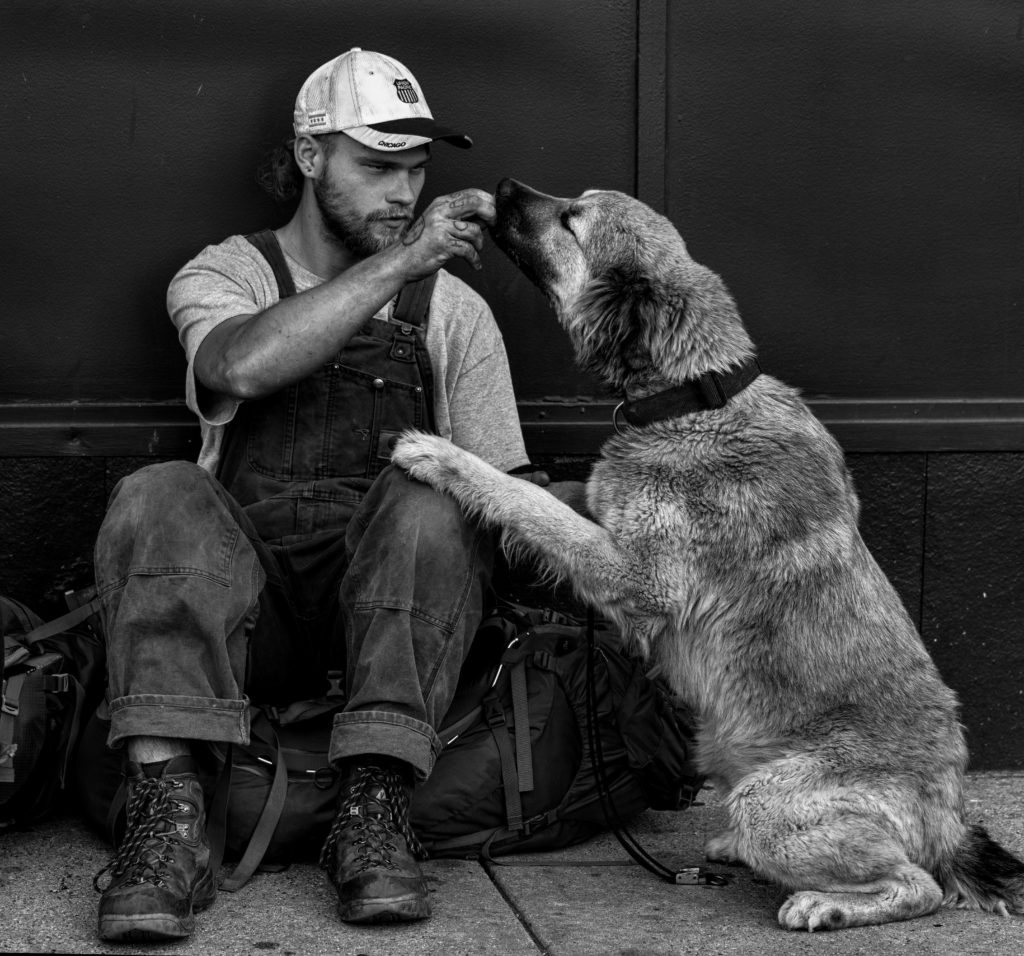
出力結果
ダウンロードしたDeOldifyにあるtest_imagesに入力するモノクロ画像を格納し実行しました。
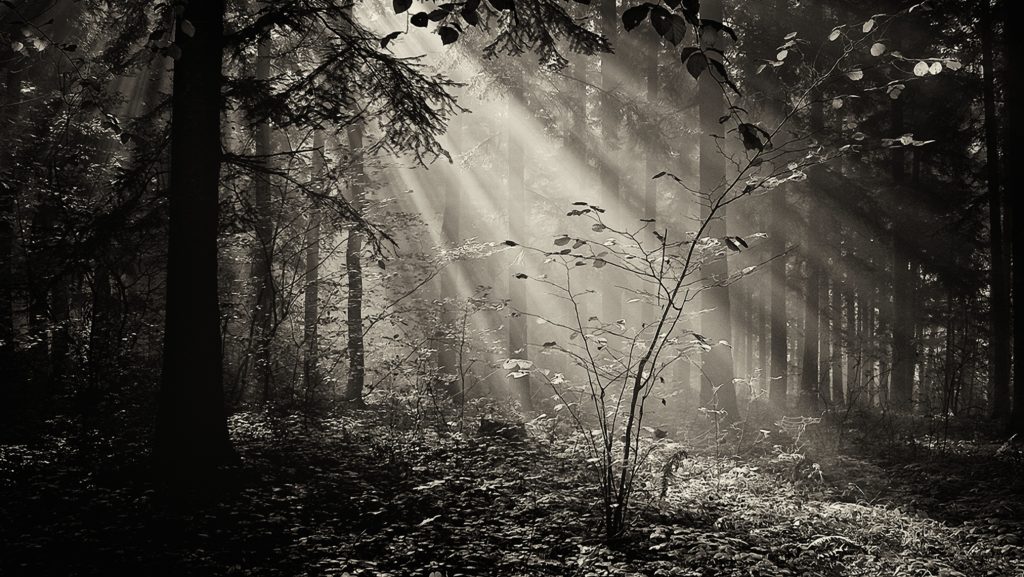
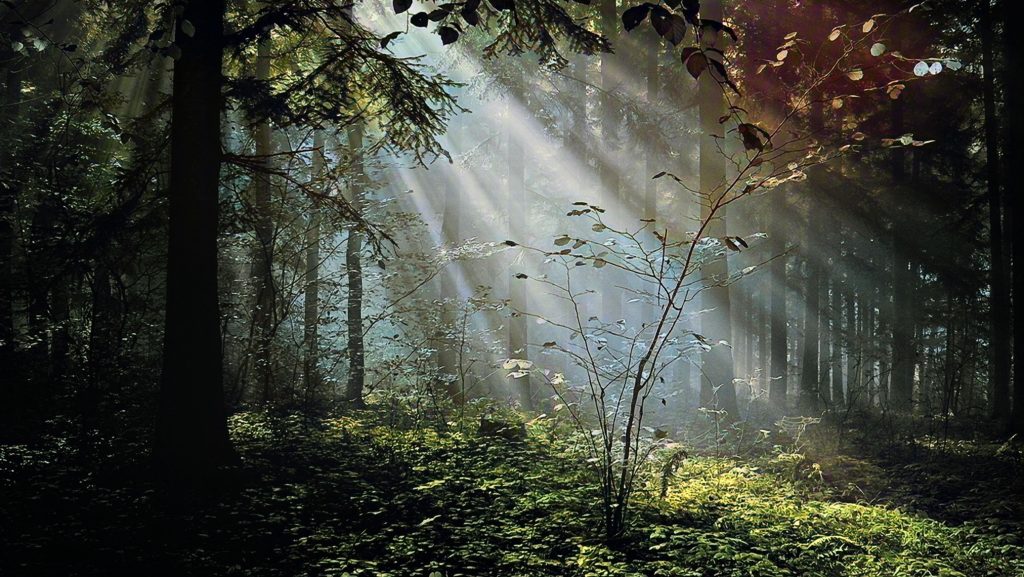
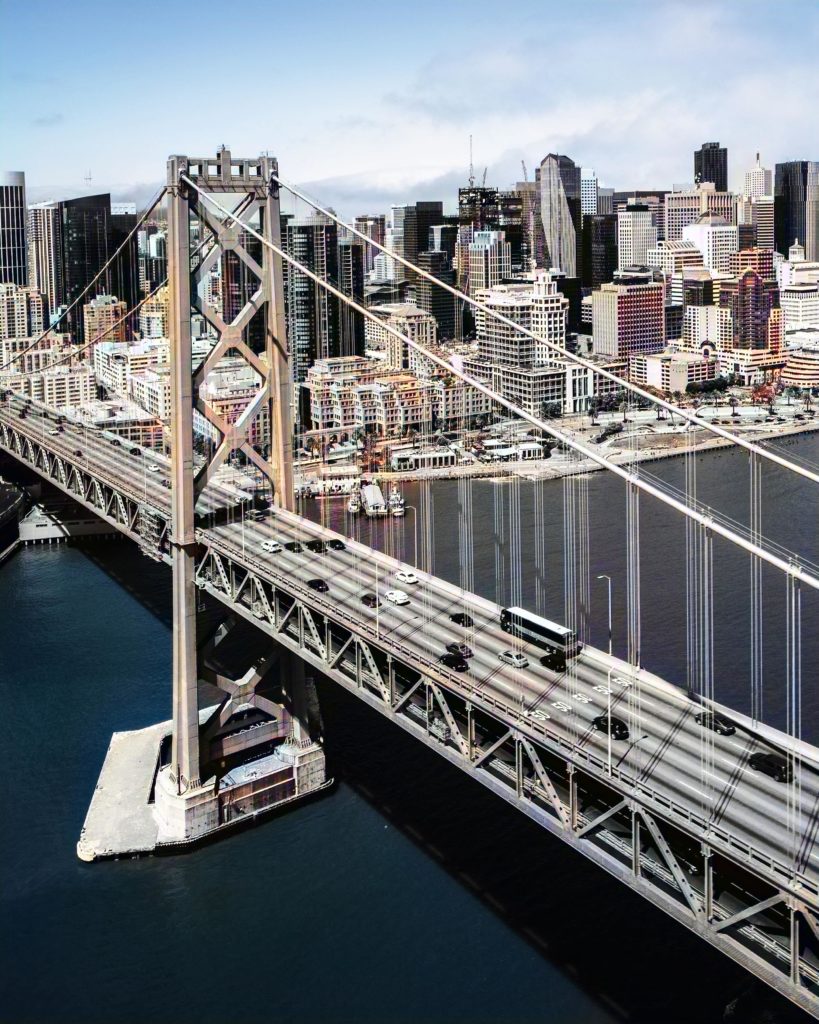
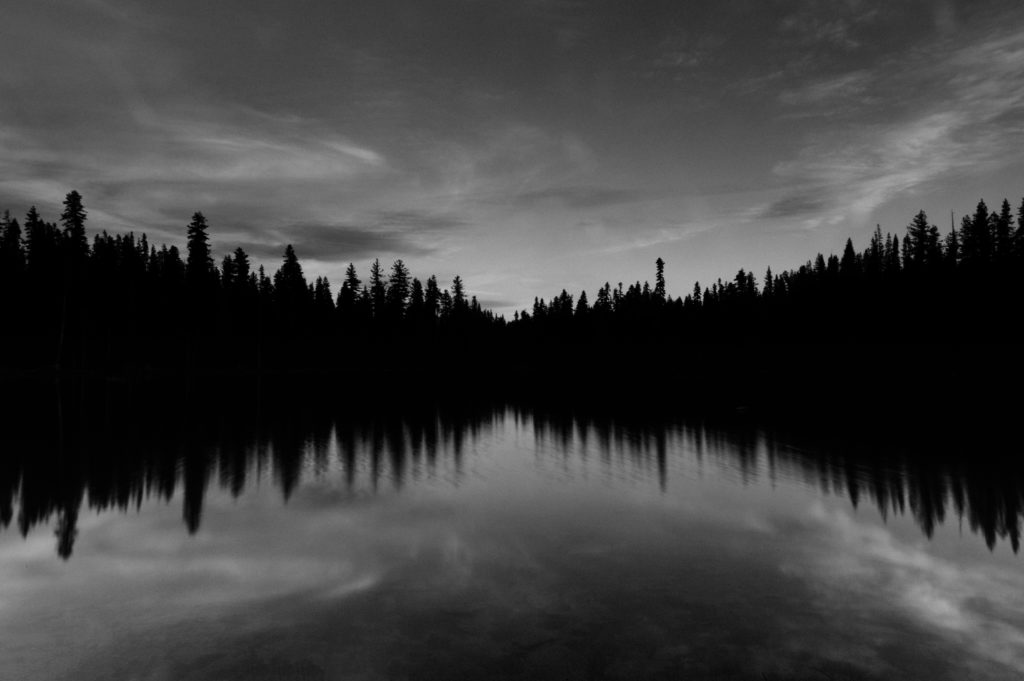
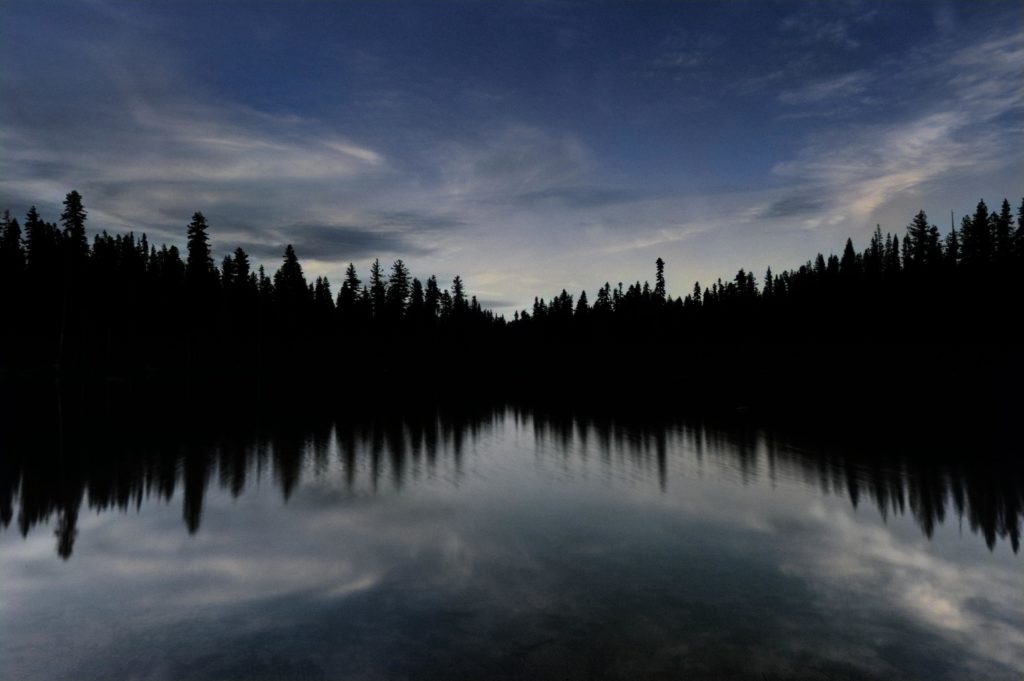

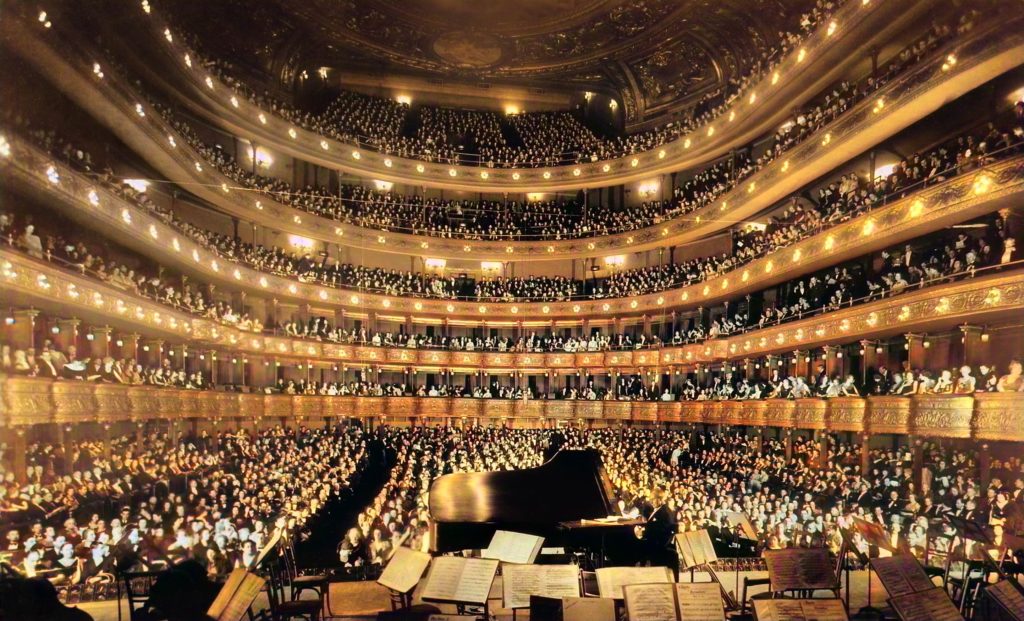
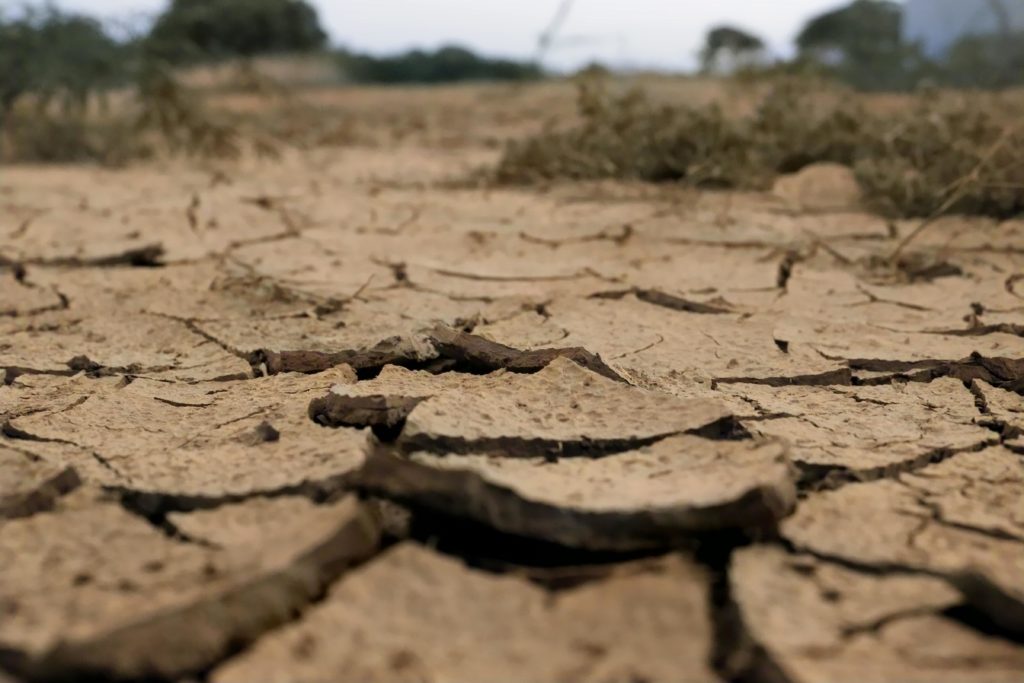
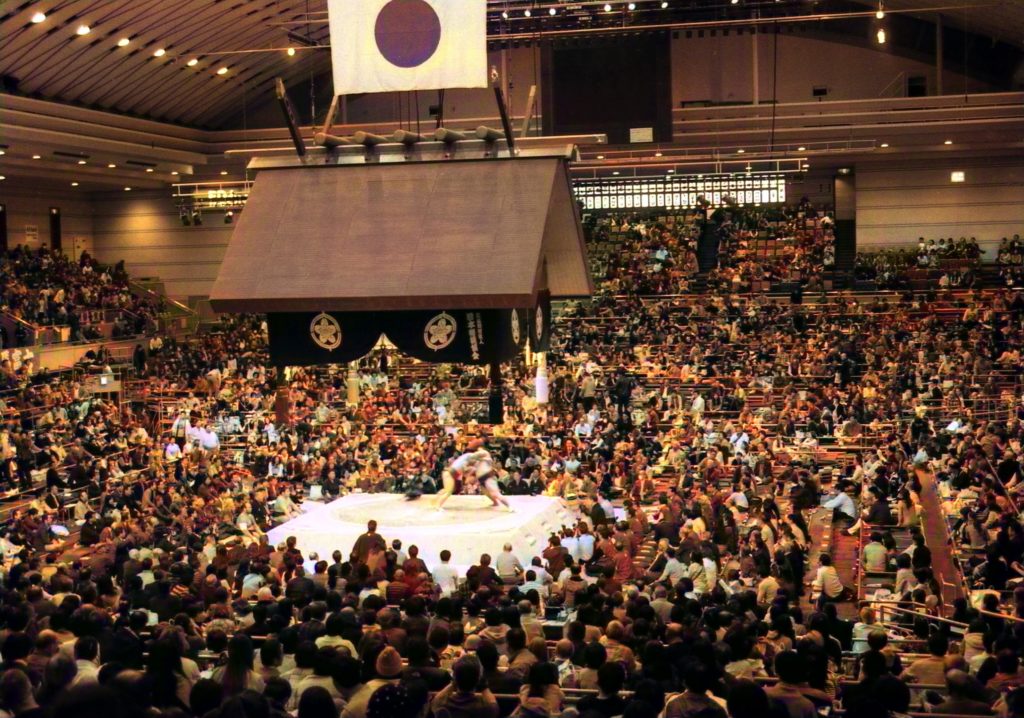
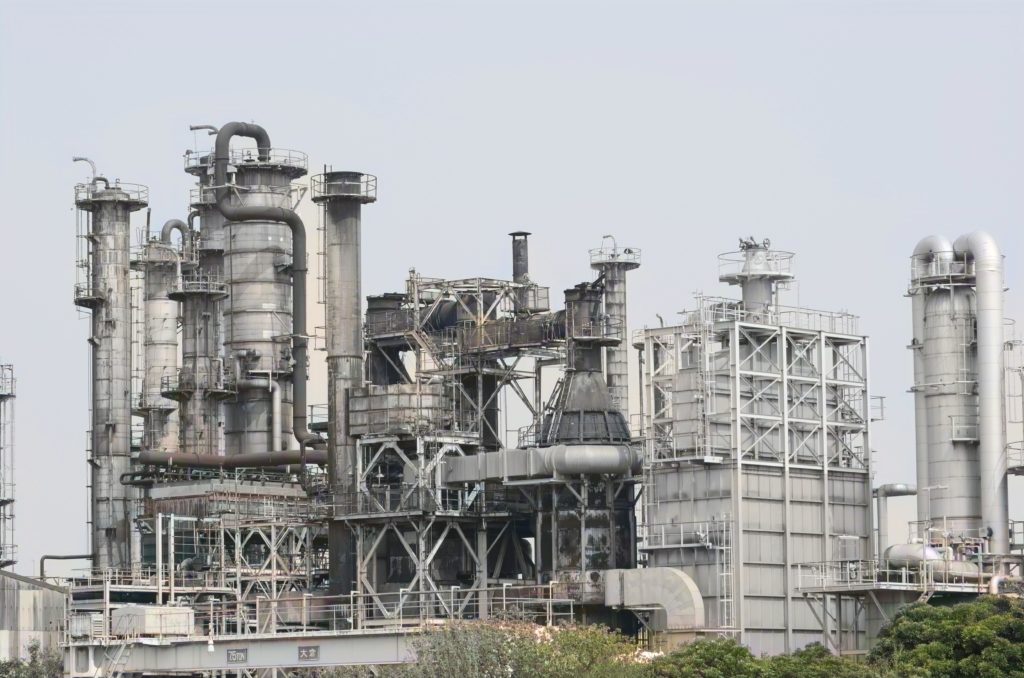
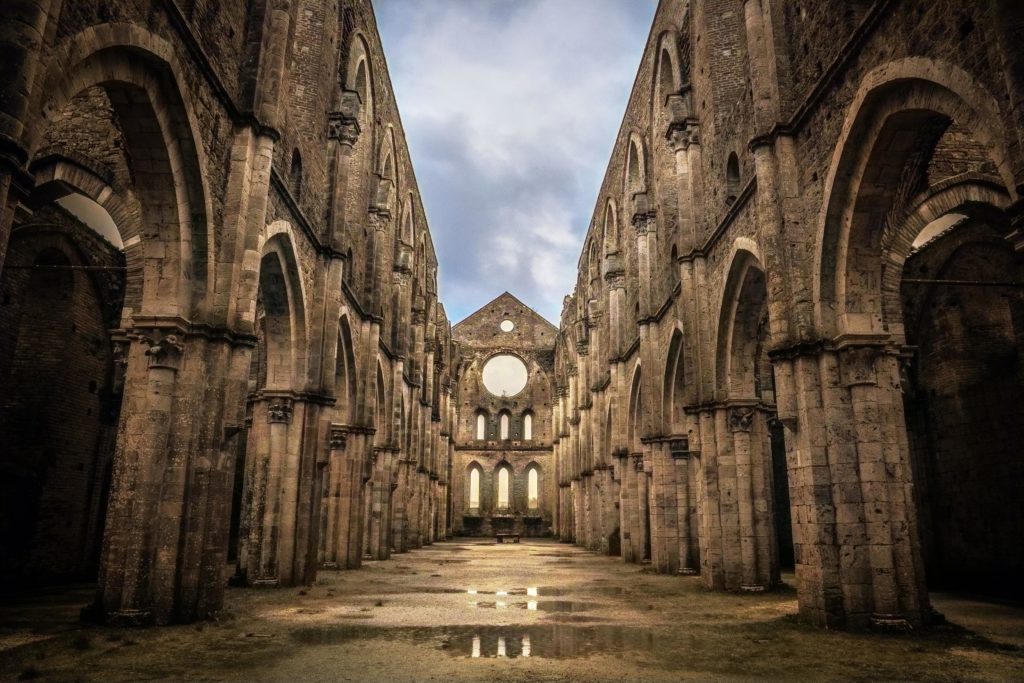
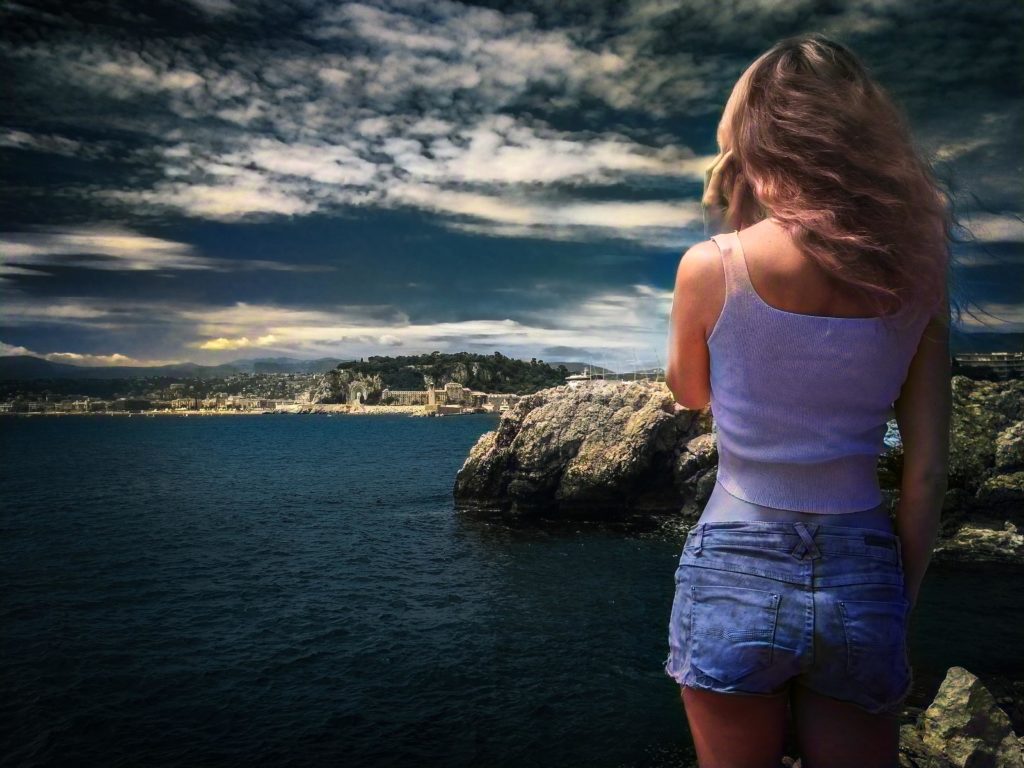
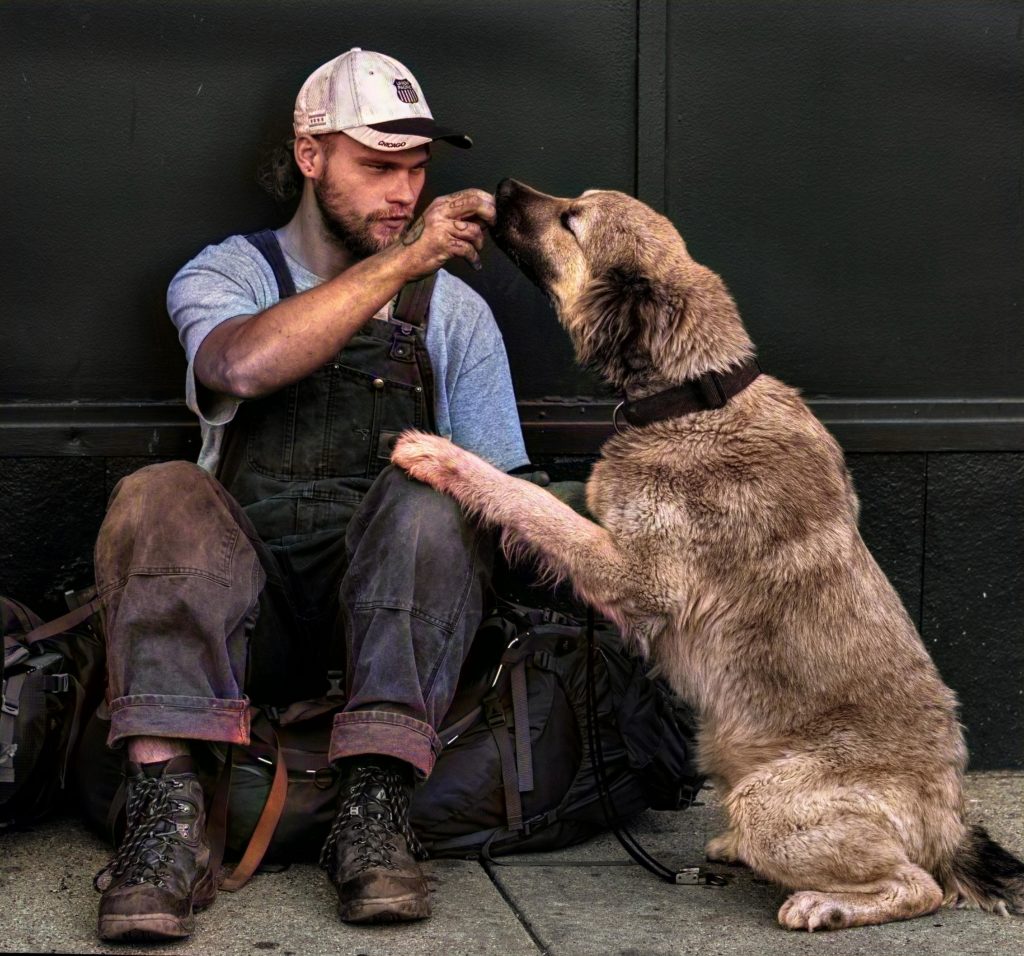
どうでしょうか?
今回は、DeOldifを用いてモノクロ画像の自動色付けを行ってみました。より複雑なモノクロ画像に対して実施してみるのもいいかもしれません。