
pythonによる物体検知は、どのようにしたらできるのでしょうか。
このような疑問にお答えします。
物体検知は、openCVを使えば実現することができます。openCVは、コンピュータで動画像を処理するための機能を提供するライブラリです。
pythonでも使用することができ、opencv-pythonとして提供されています。
opencv-pythonは、以下のコマンドでインストールできます。
|
1 |
pip install opencv-python |
pythonプロンプトを起動し、以下のプログラムを実行してimportエラーが発生しなければインストール成功です。
|
1 |
import cv2 |
実際に物体検知をしてみます。今回は、物体検知として顔検出を行ってみたいと思います。
opencvでは、学習済みの顔検出用のデータが提供されていますので、こちらのデータを使用します。
githubのリポジトリからダウンロードしたデータを任意の場所に置いてください。本記事では、pythonの実行ファイルと同一のディレクトリに置きました。
- haarcascade_frontalface_default.xml 顔検出用に使用
- haarcascade_eye.xml 瞳検出用に使用
顔検出で使用するデータは、以下のwebページの素材を使用しました。
フリー素材ぱくたそ
顔検出手順
detectMultiScaleで検出します。
|
1 |
faces = face_cascade.detectMultiScale(igray) |
検出箇所に対して、様々な画像処理を実施します。
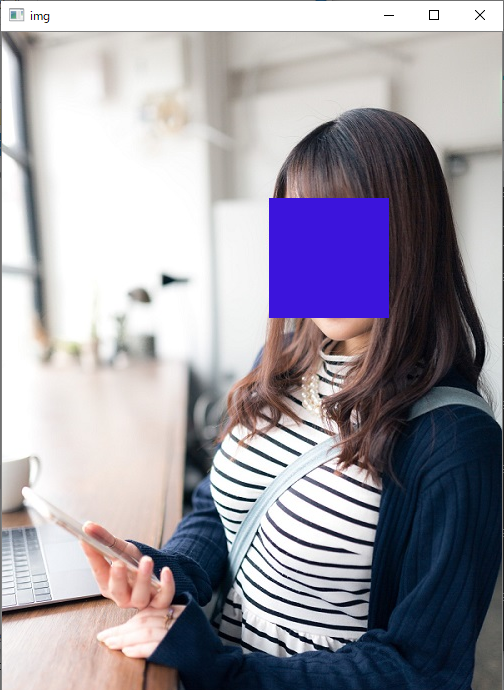
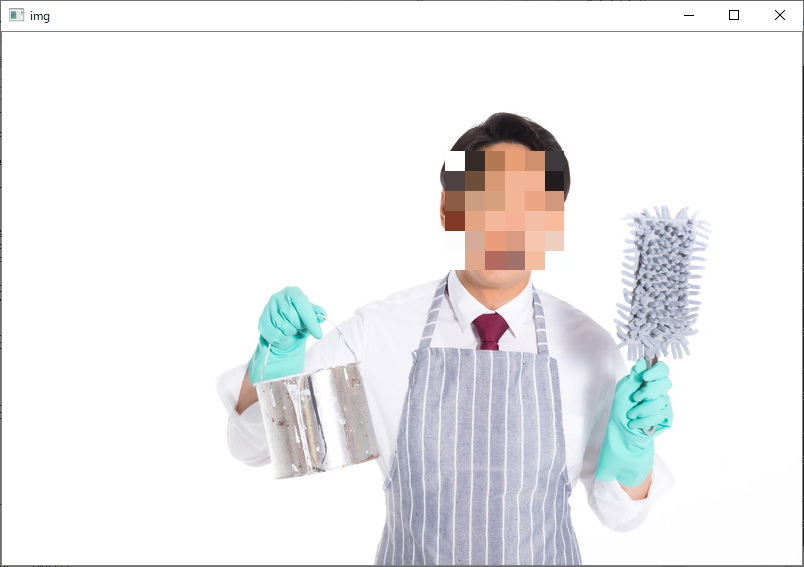
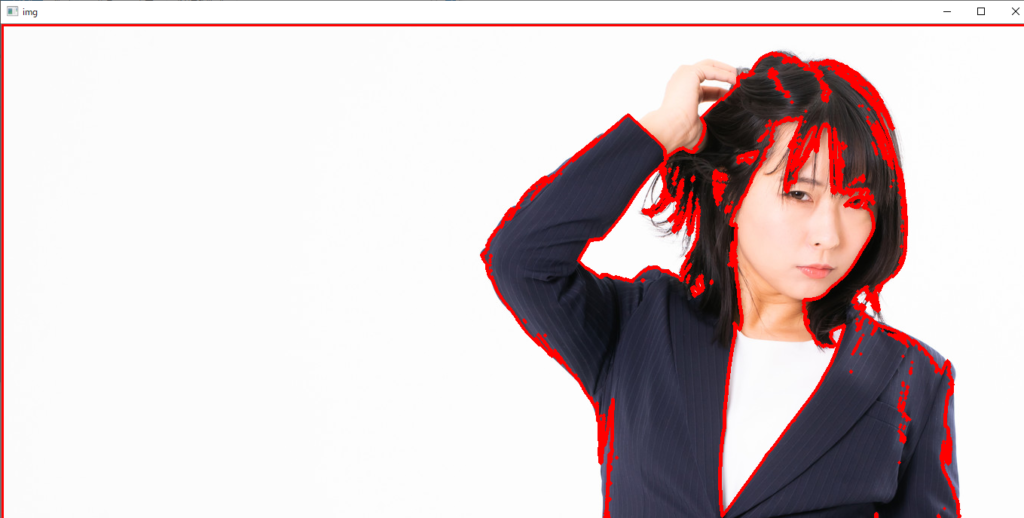
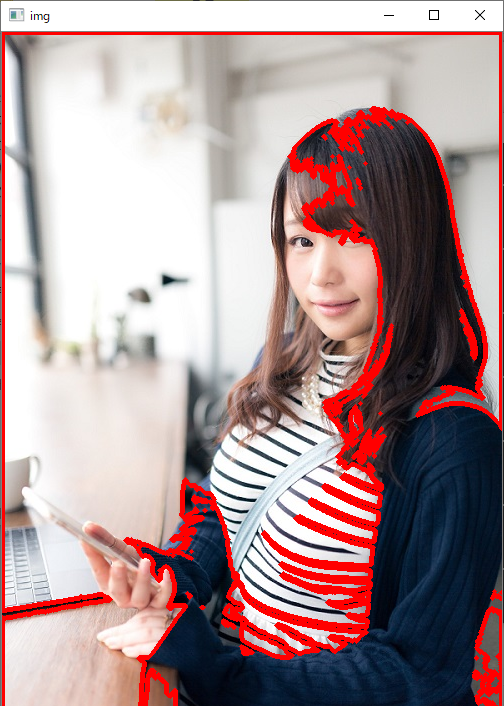
0:検出箇所を囲む、1:検出箇所に色を塗る、2:検出箇所にモザイク処理をする、3:輪郭を抽出する
|
1 2 3 4 5 6 7 8 9 10 11 12 13 14 15 16 17 18 19 20 21 22 23 24 25 26 27 28 29 30 31 32 33 34 35 36 |
selected_process = input("process select 0:detect normal, 1:fill, 2:mosaic 3: edge->") if selected_process == '0': for x, y, w, h in faces: img = cv2.rectangle(img, (x, y), (x+w, y+h), (255, 0, 0), 2) face_gray = igray[y:y+h, x:x+w] face_color = img[y:y+h, x:x+w] eyes = eye_cascade.detectMultiScale(face_gray) for ex, ey, ew, eh in eyes: cv2.rectangle(face_color, (ex, ey), (ex + ew, ey + eh), (0, 255, 0), 2) elif selected_process == '1': # 顔検出後、該当箇所色塗り for x, y, w, h in faces: img[y:y+h, x:x+w] = [220, 20, 60] elif selected_process == '2': # 顔検出後、モザイク処理 ratio = 0.05 for x, y, w, h in faces: small = cv2.resize(img[y:y+h, x:x+w], None, fx=ratio, fy=ratio, interpolation=cv2.INTER_NEAREST) img[y:y+h, x:x+w] = cv2.resize(small, (w, h), interpolation=cv2.INTER_NEAREST) elif selected_process == '3': # エッジ抽出 ret, thresh = cv2.threshold(igray, 88, 255, 0) contours, hierarchy = cv2.findContours(thresh, cv2.RETR_EXTERNAL, cv2.CHAIN_APPROX_SIMPLE) img = cv2.drawContours(img, contours, -1, (0, 0, 255), 3) else: pass |
以下にソースコードの全体を示します。
|
1 2 3 4 5 6 7 8 9 10 11 12 13 14 15 16 17 18 19 20 21 22 23 24 25 26 27 28 29 30 31 32 33 34 35 36 37 38 39 40 41 42 43 44 45 46 47 48 49 50 51 52 53 54 55 56 57 58 59 60 61 |
# coding: utf-8 import numpy as np import cv2 import matplotlib.pyplot as plt def fn_face_detect(): face_cascade = cv2.CascadeClassifier('haarcascade_frontalface_default.xml') eye_cascade = cv2.CascadeClassifier('haarcascade_eye.xml') filename = input("image name ->") img = cv2.imread(filename) igray = cv2.cvtColor(img, cv2.COLOR_BGR2GRAY) faces = face_cascade.detectMultiScale(igray) selected_process = input("process select 0:detect normal, 1:fill, 2:mosaic 3: edge->") if selected_process == '0': for x, y, w, h in faces: img = cv2.rectangle(img, (x, y), (x+w, y+h), (255, 0, 0), 2) face_gray = igray[y:y+h, x:x+w] face_color = img[y:y+h, x:x+w] eyes = eye_cascade.detectMultiScale(face_gray) for ex, ey, ew, eh in eyes: cv2.rectangle(face_color, (ex, ey), (ex + ew, ey + eh), (0, 255, 0), 2) elif selected_process == '1': # 顔検出後、該当箇所色塗り for x, y, w, h in faces: img[y:y+h, x:x+w] = [220, 20, 60] elif selected_process == '2': # 顔検出後、モザイク処理 ratio = 0.05 for x, y, w, h in faces: small = cv2.resize(img[y:y+h, x:x+w], None, fx=ratio, fy=ratio, interpolation=cv2.INTER_NEAREST) img[y:y+h, x:x+w] = cv2.resize(small, (w, h), interpolation=cv2.INTER_NEAREST) elif selected_process == '3': # エッジ抽出 ret, thresh = cv2.threshold(igray, 88, 255, 0) contours, hierarchy = cv2.findContours(thresh, cv2.RETR_EXTERNAL, cv2.CHAIN_APPROX_SIMPLE) img = cv2.drawContours(img, contours, -1, (0, 0, 255), 3) else: pass cv2.imshow('img', img) cv2.waitKey(0) cv2.destroyAllWindows() if __name__ == '__main__': fn_face_detect() |
出力結果としては、以下のようになりました。
【元画像】


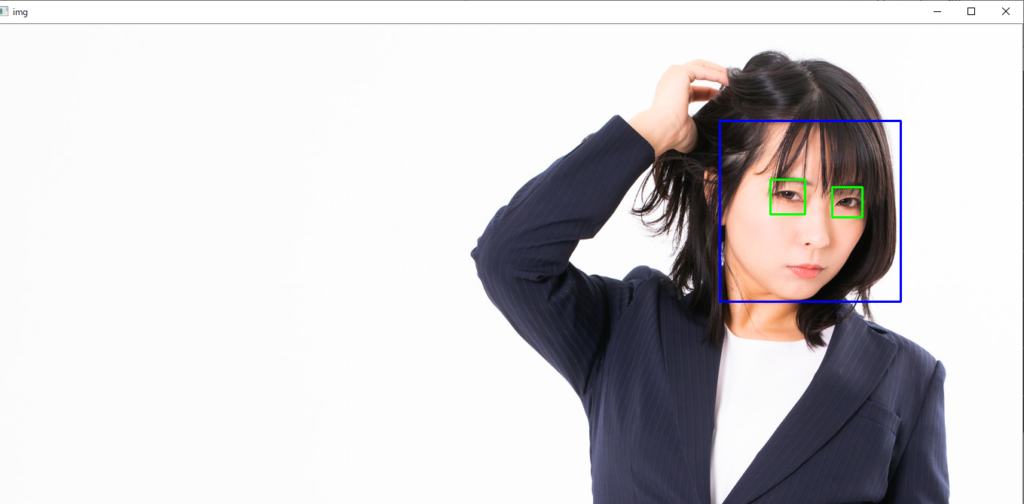
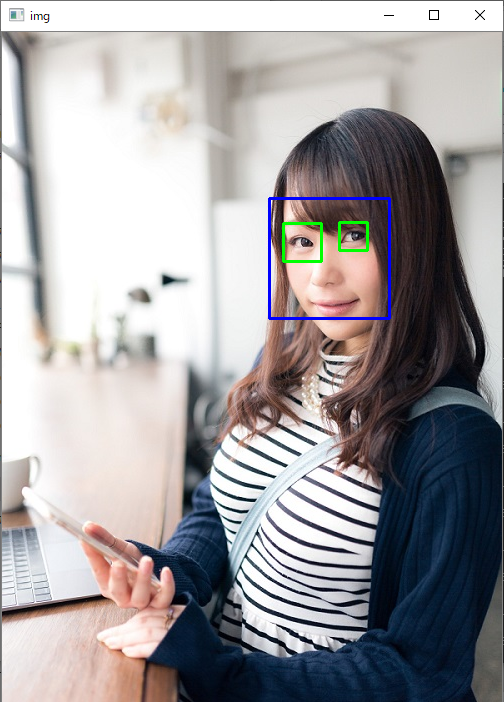
【検出箇所を囲む】

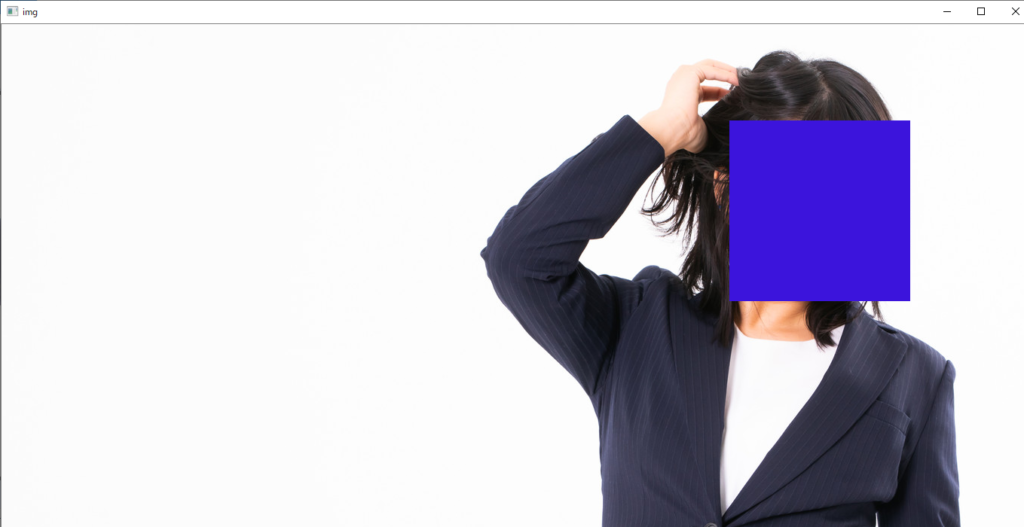
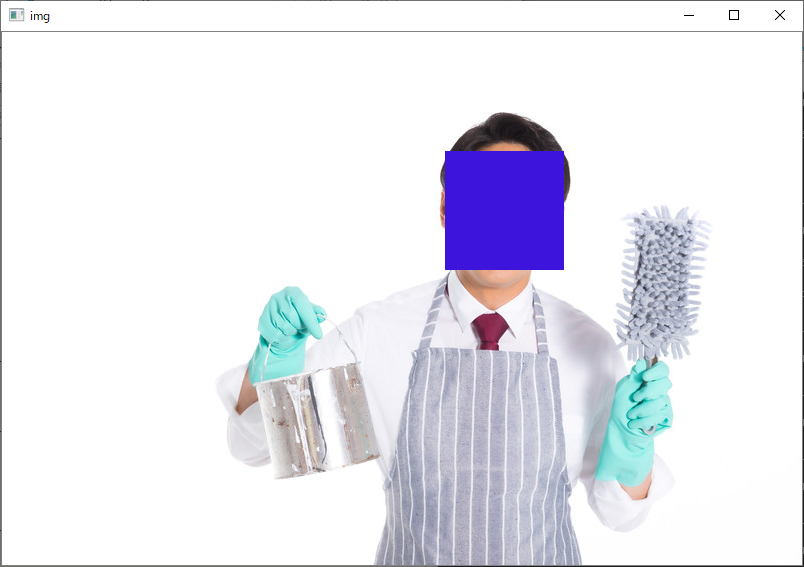
【検出箇所に色を塗る】
【検出箇所にモザイク処理をする】


【輪郭を抽出する】

どうでしょうか?
このように、pythonでもopenCVを使用することができ、簡単に物体検知を実現し、応用的な処理ができます。これを機会にpythonによるopenCVを試してみてはいかがでしょうか。