深層学習(ディープラーニング)手法を用いて画像認識してみたいです。
このような要望にお応えします。
今回は画像認識タスクの一つである画像分類を深層学習手法を用いて行います。
また、Pytorchを利用します。
Pytorchは、ニューラルネットワークモデルの構築をサポートしてくれます。
このライブラリを使用して、画像分類のモデル構築と評価を行います。
画像分類に使用するデータは、画像認識のサンプルデータとして頻繁に使用されるMNIST手書き文字画像データセットを使用します。
画像分類のモデルは、NN(Neural Network)、CNN(Convolutional Neural Network)を使用します。
Pytorchの実行環境は、Google Colaboratoryを利用しました。
PythonライブラリKerasを用いた手書き文字分類も行っていますので、こちらも興味のある方は確認してみてください。
今回使用するライブラリのバージョンは以下になります。
- python 3.7
- torch 1.5.1
- torchvision 0.6.1
画像認識をはじめていきます。手順は、大きく以下のようになります。
- 画像データの準備
- モデルの定義
- モデルの学習/評価
- 画像分類結果出力
画像データの準備
各手書き数字画像は、28*28ピクセル(=784ピクセル)で構成されています。
学習データには60000個の画像が用意され、検証用データには10000個の画像を使用することができます。そして、0~9までの10クラスがあり、これらのクラスに正しく分類できるようにモデルの学習を行います。
NNの入力はベクトルですので、画像をベクトルデータになるように変換します。
CNNの入力は2次元画像のままできますので、Convolution層への入力は、そのまま画像データを使用することができます。そして、Convolution層の出力をNNに入力する際に、1次元のベクトルに変換します。
今回の問題は、画像が0~9の整数のうち、どれに相当するのかを学習するマルチクラス分類の問題になりますので、学習時に必要となる0~9のクラスを示すベクトルを用意することになります。
-1~1の範囲で、平均0.5, 標準偏差0.5になるように正規化し、
学習用データと検証用データをtrainloader, testloaderに読み出します。
|
1 2 3 4 5 6 7 8 9 10 11 12 13 14 15 16 17 |
import torch import torchvision import torchvision.transforms as transforms import numpy as np import datetime device = torch.device('cuda' if torch.cuda.is_available() else 'cpu') transform = transforms.Compose([transforms.ToTensor(), transforms.Normalize((0.5, ), (0.5, ))]) trainset = torchvision.datasets.MNIST(root='./data', train=True, download=True, transform=transform) trainloader = torch.utils.data.DataLoader(trainset, batch_size=100, shuffle=True, num_workers=2) testset = torchvision.datasets.MNIST(root='./data', train=False, download=True, transform=transform) testloader = torch.utils.data.DataLoader(testset, batch_size=100, shuffle=False, num_workers=2) classes = tuple(np.linspace(0, 9, 10, dtype=np.uint8)) |
これでデータの準備は完了です。
今回はMNISTの手書き文字画像を使用していますが、これ以外の自前画像データを用いたい場合もあるかと思います。
下記の記事にて自前画像データを扱ったプログラムを紹介しておりますので、興味のある方は確認してみてはいかがでしょうか。
モデルの定義
次は学習モデルを定義していきます。
NN, CNNのモデルを定義します。
まずは、NNを定義します。
入力層を784(画像ベクトル表現の次元数)、中間層ユニット64、活性化関数としてrelu、出力層を10としたsoftmaxを使用します。
Kerasを用いてネットワークを表現した場合は、下記のようになります。
|
1 2 3 4 5 6 7 8 9 |
def nn_model(): model = Sequential() model.add(Dense(num_pixels, input_dim=num_pixels, kernel_initializer='normal', activation='relu')) model.add(Dense(64, kernel_initializer='normal', activation='relu')) model.add(Dense(num_classes, kernel_initializer='normal', activation='softmax')) model.compile(loss='categorical_crossentropy', optimizer='adam', metrics=['accuracy']) return model |
Pytorchを用いてネットワークを表現した場合は、下記のようになります。
|
1 2 3 4 5 6 7 8 9 10 11 12 13 14 15 16 17 18 19 20 |
# NNモデル定義 class nnNet(nn.Module): def __init__(self): super(nnNet, self).__init__() self.fc1 = nn.Linear(784, 64) self.fc2 = nn.Linear(64, 10) def forward(self, x): x = F.relu(self.fc1(x)) x = F.log_softmax(self.fc2(x)) return x model = nnNet() # 損失関数の定義 criterion = nn.CrossEntropyLoss() # 最適化関数の定義 optimizer = optim.Adam(model.parameters(), lr=0.01) |
次にCNNを定義します。
CNNでは、畳み込み層と多層ニューラルネットワークを組み合わせたモデルを構築します。
ざっくりとCNNのモデル構築について整理します。
畳み込み層を用いて、分類に役立つ特徴的な箇所を抽出し、分類に役立たない箇所を除去するような特徴量を獲得したうえで、これを多層ニューラルネットワークの入力として使用します。
畳み込み層は、Conv2D, MaxPooling2Dを用いて構築します。
Kerasを用いてネットワークを表現した場合は、以下のようになります。
|
1 2 3 4 5 6 7 8 9 10 11 12 13 14 15 16 17 18 |
# CNNモデル定義 def cnn_model(): model = Sequential() model.add(Conv2D(32, (3, 3), activation='relu', input_shape=(28, 28, 1))) model.add(MaxPooling2D((2, 2))) model.add(Conv2D(64, (3, 3), activation='relu')) model.add(MaxPooling2D((2, 2))) model.add(Conv2D(64, (3, 3), activation='relu')) model.add(Flatten()) model.add(Dense(64, activation='relu')) model.add(Dense(10, activation='softmax')) model.compile(loss='categorical_crossentropy', optimizer='adam', metrics=['accuracy']) model.summary() return model |
Conv2D(32, (3, 3), activation=’relu’, input_shape=(28, 28, 1))では、入力画像のサイズを指定し、フィルタ数32、フィルタサイズ3*3を指定しています。この処理により、サイズ26(=28-2)*26(=28-2)の特徴マップが32個作成されます。MaxPooling2D((2, 2))では、ダウンサンプリングを行い、サイズ13*13の特徴マップが32個作成されます。
Conv2D(64, (3, 3), activation=’relu’)では、サイズ11(=13-2)*11(=13-2)の特徴マップが64個作成されます。 MaxPooling2D((2, 2))では、ダウンサンプリングを行い、サイズ5*5の特徴マップが64個作成されます。
Conv2D(64, (3, 3), activation=’relu’)では、サイズ3(=5-2)*3(=5-2)の特徴マップが64個作成されます。このように、ネットワークが深くなるに従い、データのサイズが圧縮されます。
このような畳み込み層から得られた特徴ベクトルを多層ニューラルネットワークに入力します。
そのために、Conv2D(64, (3, 3), activation=’relu’)で獲得した特徴量は(3, 3, 64)の3次元ですので、これをFlatten()を用いて入力できるようにベクトルに変換します。
次にshape(3, 3, 64)を一つ以上のDenseレイヤーを用意して分類を実行します。
MNISTは10クラスですので、Denseレイヤーの出力を10にし、softmax関数を指定します。
Pytorchを用いてネットワークを表現した場合は、下記のようになります。
|
1 2 3 4 5 6 7 8 9 10 11 12 13 14 15 16 17 18 19 20 21 22 23 24 25 26 27 28 29 |
# CNNモデル定義 class cnnNet(nn.Module): def __init__(self): super(cnnNet, self).__init__() self.conv1 = nn.Conv2d(1, 32, 3) # 28*28*1 -> 26*26*32 self.pool1 = nn.MaxPool2d(2, 2) # 26*26*32 -> 13*13*32 self.conv2 = nn.Conv2d(32, 64, 3) # 13*13*32 -> 11*11*64 self.pool2 = nn.MaxPool2d(2, 2) # 11*11*64 -> 5*5*64 self.conv3 = nn.Conv2d(64, 64, 3) # 5*5*64 -> 3*3*64 self.fc1 = nn.Linear(3*3*64, 64) self.fc2 = nn.Linear(64, 10) def forward(self, x): x = self.pool1(F.relu(self.conv1(x))) x = self.pool2(F.relu(self.conv2(x))) x = F.relu(self.conv3(x)) x = x.view(-1, 3*3*64) x = F.relu(self.fc1(x)) x = F.log_softmax(self.fc2(x)) return x model = cnnNet() # 損失関数の定義 criterion = nn.CrossEntropyLoss() # 最適化関数の定義 optimizer = optim.Adam(model.parameters(), lr=0.01) |
これでモデルの定義は完了です。
モデルの学習/評価
モデルを学習し、検証用データでモデルを評価してみます。
学習方法を定義します。
|
1 2 3 4 5 6 7 8 9 10 11 12 13 14 15 16 17 18 19 20 21 22 23 24 |
# モデルの学習 def fn_train(model, epoch, optimizer, train_loader, criterion=nn.CrossEntropyLoss()): total_loss = 0 total_size = 0 model.train() for batch_idx, (data, target) in enumerate(train_loader): data, target = data.to(device), target.to(device) # print(data.shape) #torch.Size([100, 1, 28, 28]) # data = data.view(-1, 28*28) #torch.Size([100, 784]) optimizer.zero_grad() output = model(data) loss = criterion(output, target) total_loss += loss.item() total_size += data.size(0) loss.backward() optimizer.step() if batch_idx % 1000 == 0: now = datetime.datetime.now() print('[{}] Train Epoch: {} [{}/{} ({:.0f}%)] Average loss: {:.6f}'.format(now, epoch, batch_idx*len(data), len(train_loader.dataset), 100. * batch_idx / len(train_loader), total_loss / total_size)) |
上記の学習を指定したepoch数だけ実施します。
|
1 2 3 4 |
# モデルの学習 for epoch in range(1, 4): fn_train(model=model, epoch=epoch, optimizer=optimizer, train_loader=trainloader, criterion=criterion) |
学習済みのモデルを保存することができます。
|
1 2 |
torch.save(model.state_dict(), 'nn_dict.model') torch.save(model, 'nn.model') |
保存したモデルを読み出して使用することもできます。
|
1 2 |
param = torch.load('nn_dict.model') model.load_state_dict(param) |
モデル評価を行います。
|
1 2 3 4 5 6 7 8 9 10 11 12 13 14 15 16 17 18 |
# 学習済みモデルの評価 from sklearn.metrics import classification_report pred = [] y_res = [] for index, (x, y) in enumerate(testloader): with torch.no_grad(): # x = x.view(-1, 28*28) #torch.Size([100, 784]) output = model(x) pred += [int(l.argmax()) for l in output] y_res += [int(l) for l in y] print(classification_report(y_res, pred)) from sklearn.metrics import confusion_matrix print(confusion_matrix(y_res, pred)) |
NNモデルの評価結果です。
|
1 2 3 4 5 6 7 8 9 10 11 12 13 14 15 16 17 18 19 20 21 22 23 24 25 |
0 0.96 0.98 0.97 980 1 0.98 0.97 0.97 1135 2 0.97 0.85 0.90 1032 3 0.89 0.88 0.88 1010 4 0.89 0.92 0.91 982 5 0.86 0.90 0.88 892 6 0.96 0.93 0.94 958 7 0.92 0.95 0.94 1028 8 0.88 0.92 0.90 974 9 0.90 0.92 0.91 1009 accuracy 0.92 10000 macro avg 0.92 0.92 0.92 10000 weighted avg 0.92 0.92 0.92 10000 [[ 961 0 0 2 1 7 3 3 1 2] [ 0 1097 0 6 1 3 3 2 22 1] [ 4 5 874 59 19 5 6 15 41 4] [ 3 0 11 889 0 76 0 8 14 9] [ 0 0 3 0 905 1 8 11 2 52] [ 11 2 4 16 14 804 6 6 22 7] [ 16 3 1 1 33 11 887 1 5 0] [ 2 3 8 15 5 0 0 976 2 17] [ 3 5 0 8 11 21 10 10 900 6] [ 4 2 0 5 27 11 1 24 8 927]] |
CNNのモデル評価結果です。
|
1 2 3 4 5 6 7 8 9 10 11 12 13 14 15 16 17 18 19 20 21 22 23 24 25 26 27 |
precision recall f1-score support 0 0.98 0.99 0.99 980 1 0.99 0.98 0.99 1135 2 0.98 0.96 0.97 1032 3 0.96 0.99 0.97 1010 4 0.93 0.99 0.96 982 5 0.96 0.99 0.98 892 6 0.99 0.97 0.98 958 7 0.99 0.97 0.98 1028 8 0.96 0.98 0.97 974 9 0.99 0.91 0.95 1009 accuracy 0.97 10000 macro avg 0.97 0.97 0.97 10000 weighted avg 0.97 0.97 0.97 10000 [[ 971 1 0 0 3 0 3 1 1 0] [ 0 1117 1 4 10 0 1 1 1 0] [ 5 5 995 13 1 0 0 5 8 0] [ 1 0 5 998 0 6 0 0 0 0] [ 0 1 2 1 976 0 0 0 1 1] [ 0 0 0 7 0 881 1 0 3 0] [ 7 5 0 1 7 9 928 0 1 0] [ 0 3 10 6 2 0 0 998 3 6] [ 3 0 1 7 1 3 0 1 958 0] [ 2 0 0 6 44 16 0 2 21 918]] |
CNNモデルのほうが分類性能が高いようですね。
画像分類結果
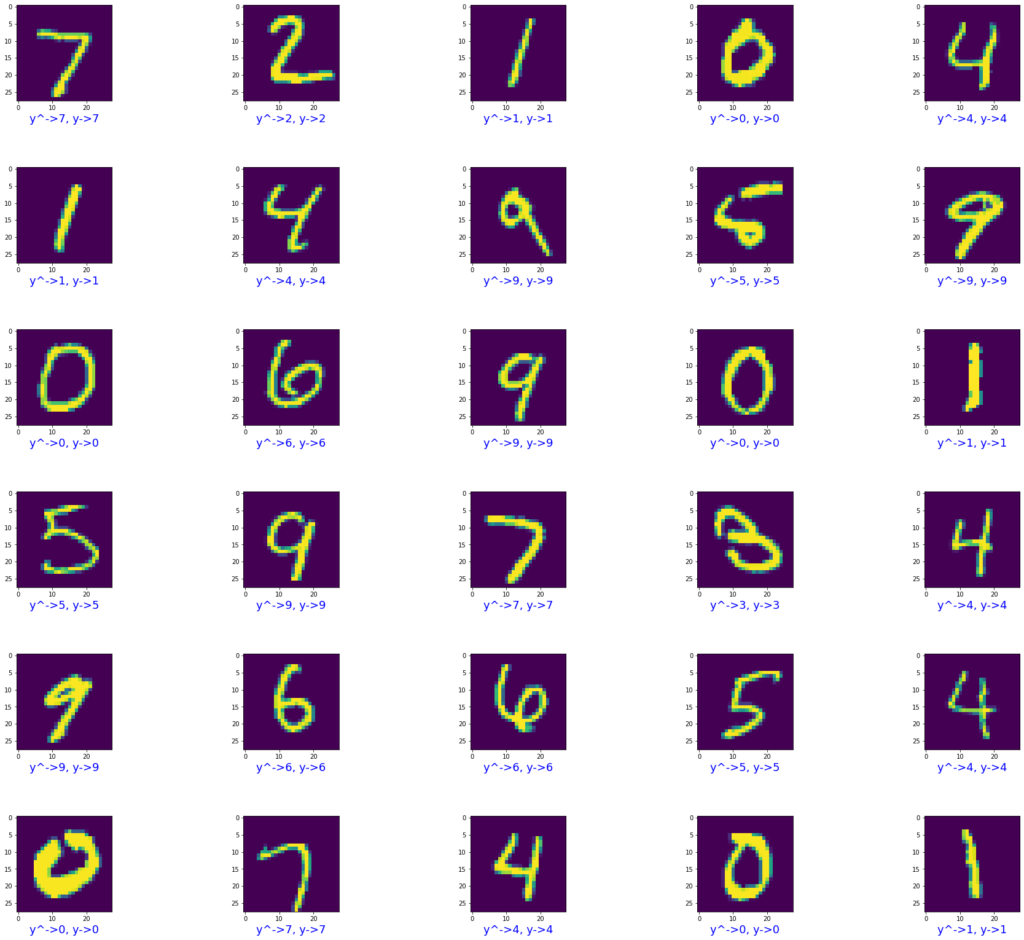
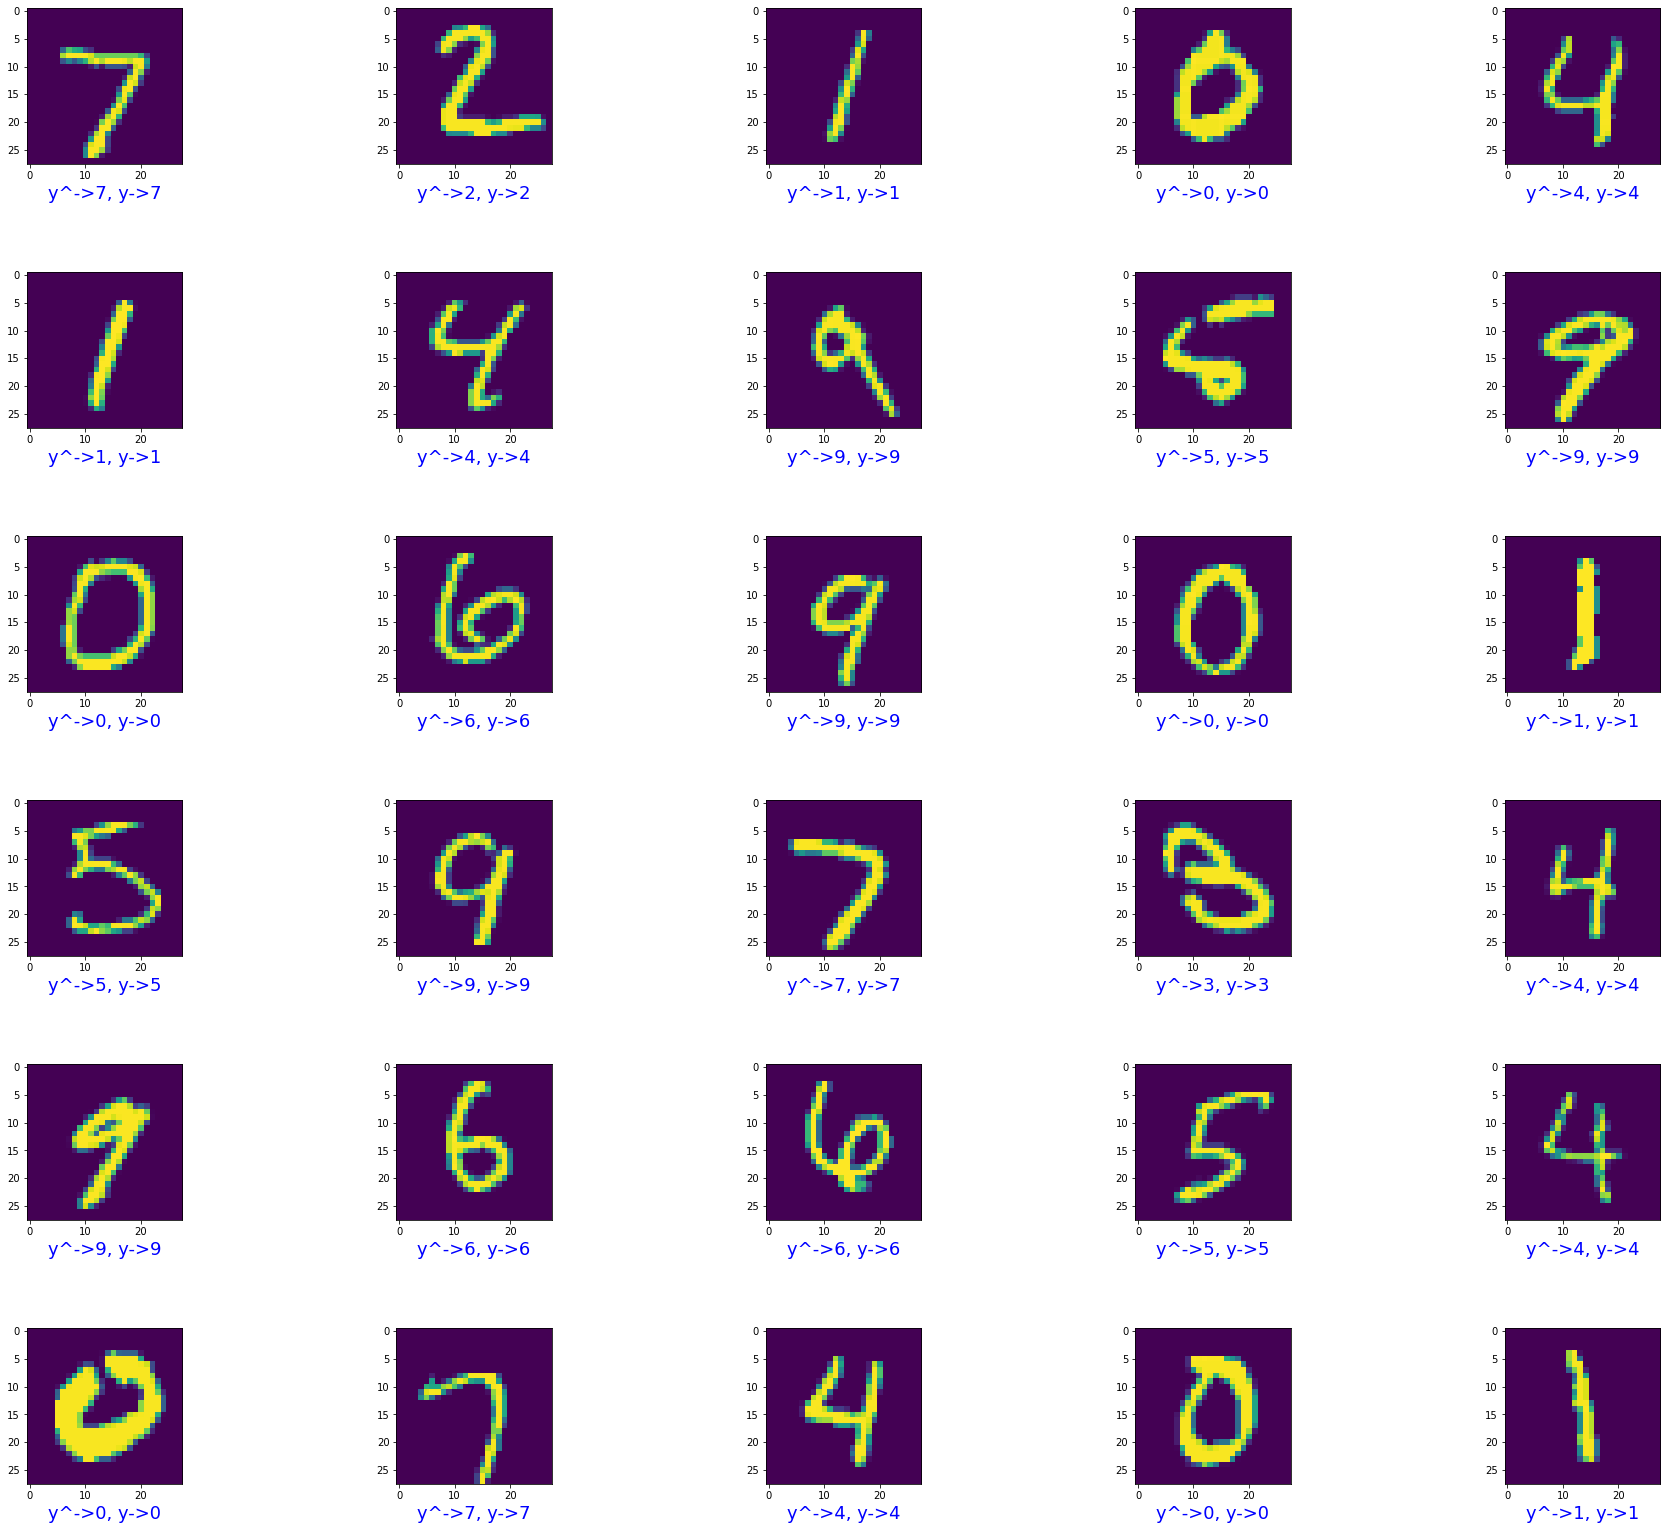
画像分類の結果は、以下のようになりました。
NN, CNNでの分類結果を載せます。
|
1 2 3 4 5 6 7 8 9 10 11 12 13 14 15 16 17 18 19 20 21 22 23 24 25 26 27 28 29 |
# 画像分類結果出力 import matplotlib.pyplot as plt %matplotlib inline plt.figure(figsize=(32, 32)) plt.subplots_adjust(wspace=0.2, hspace=0.7) image_pos = 0 cnt_disp = 30 col = 5 row = int(cnt_disp / col) + 1 data_iter = iter(testloader) images, labels = data_iter.next() for index, image in enumerate(images): if image_pos < cnt_disp: image = image.numpy() image = image.reshape((28, 28)) plt.subplot(row, col, image_pos + 1) plt.imshow(image) image_pos += 1 # 正解の場合は青、不正解の場合は赤 if pred[index] == y_res[index]: color = 'blue' else: color = 'red' plt.xlabel("y^->{}, y->{}".format(pred[index], y_res[index]), color=color, fontsize=18) |
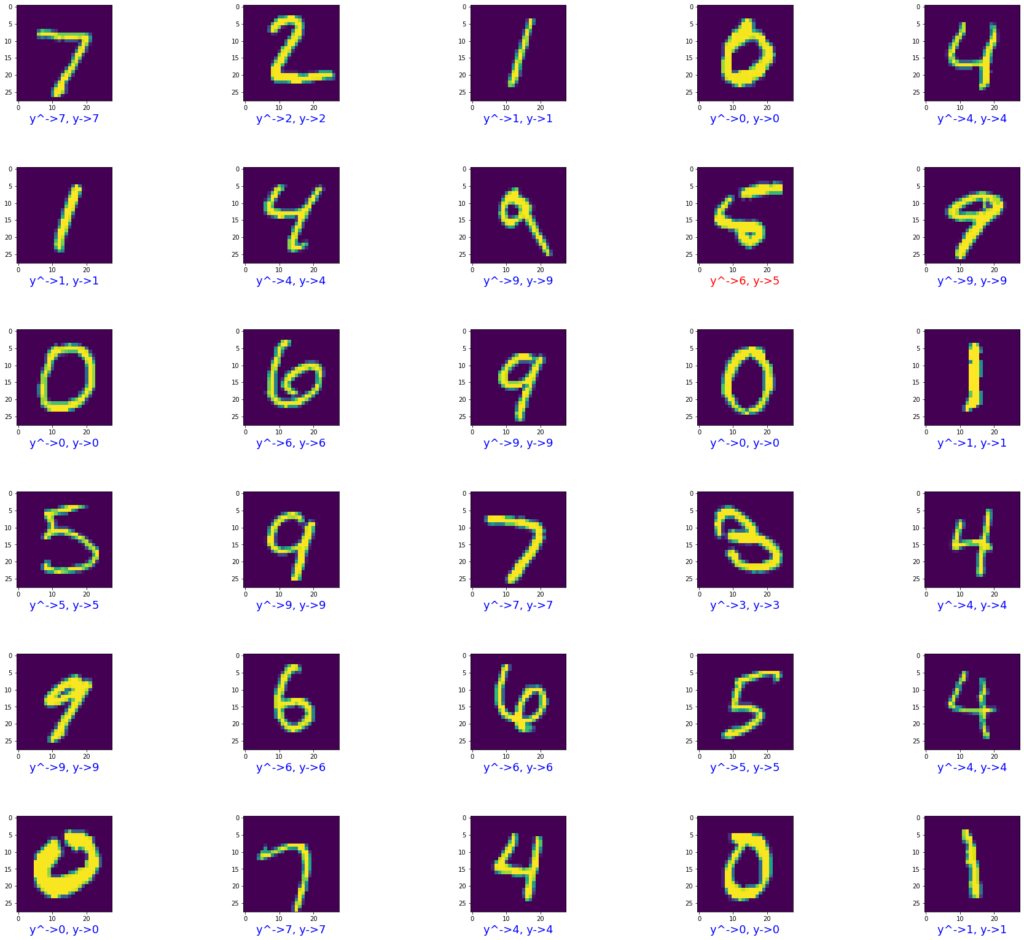
画像下に出力したラベルの色が青の場合、正解データと予測値が一致し、赤色の場合は、一致しないように出力しています。
NNモデルの画像分類結果

CNNモデルの画像分類結果

いかがでしょうか。このように、Pytorchを使用すれば比較的簡単にディープラーニングモデルを構築できます。また、モデルの学習/評価も簡単にできます。今回は、MNISTの手書き画像分類を行いましたが、自前画像を用意して試すこともできますので活用してみてはいかがでしょうか。
NN, CNNモデルのモデル定義、学習、評価のソースコード全体を載せます。
NNモデルのソースコード
|
1 2 3 4 5 6 7 8 9 10 11 12 13 14 15 16 17 18 19 20 21 22 23 24 25 26 27 28 29 30 31 32 33 34 35 36 37 38 39 40 41 42 43 44 45 46 47 48 49 50 51 52 53 54 55 56 57 58 59 60 61 62 63 64 65 66 67 68 69 70 71 72 73 74 75 76 77 78 79 80 81 82 83 84 85 86 87 88 89 90 91 92 93 94 95 96 97 98 99 100 101 102 103 104 105 106 107 108 109 110 111 112 113 114 115 116 117 118 119 120 121 122 123 124 125 126 127 128 129 |
import torch import torchvision import torchvision.transforms as transforms import numpy as np import datetime device = torch.device('cuda' if torch.cuda.is_available() else 'cpu') transform = transforms.Compose([transforms.ToTensor(), transforms.Normalize((0.5, ), (0.5, ))]) trainset = torchvision.datasets.MNIST(root='./data', train=True, download=True, transform=transform) trainloader = torch.utils.data.DataLoader(trainset, batch_size=100, shuffle=True, num_workers=2) testset = torchvision.datasets.MNIST(root='./data', train=False, download=True, transform=transform) testloader = torch.utils.data.DataLoader(testset, batch_size=100, shuffle=False, num_workers=2) classes = tuple(np.linspace(0, 9, 10, dtype=np.uint8)) # モデルの学習 def fn_train(model, epoch, optimizer, train_loader, criterion=nn.CrossEntropyLoss()): total_loss = 0 total_size = 0 model.train() for batch_idx, (data, target) in enumerate(train_loader): data, target = data.to(device), target.to(device) # print(data.shape) #torch.Size([100, 1, 28, 28]) data = data.view(-1, 28*28) #torch.Size([100, 784]) optimizer.zero_grad() output = model(data) loss = criterion(output, target) total_loss += loss.item() total_size += data.size(0) loss.backward() optimizer.step() if batch_idx % 1000 == 0: now = datetime.datetime.now() print('[{}] Train Epoch: {} [{}/{} ({:.0f}%)] Average loss: {:.6f}'.format(now, epoch, batch_idx*len(data), len(train_loader.dataset), 100. * batch_idx / len(train_loader), total_loss / total_size)) from torch import nn import torch.nn.functional as F import torch.optim as optim # NNモデル定義 class nnNet(nn.Module): def __init__(self): super(nnNet, self).__init__() self.fc1 = nn.Linear(784, 64) self.fc2 = nn.Linear(64, 10) def forward(self, x): x = F.relu(self.fc1(x)) x = F.log_softmax(self.fc2(x)) return x model = nnNet() # 損失関数の定義 criterion = nn.CrossEntropyLoss() # 最適化関数の定義 optimizer = optim.Adam(model.parameters(), lr=0.01) # モデルの学習 for epoch in range(1, 4): fn_train(model=model, epoch=epoch, optimizer=optimizer, train_loader=trainloader, criterion=criterion) # 学習済みモデルの保存 torch.save(model.state_dict(), 'nn_dict.model') torch.save(model, 'nn.model') # 保存した学習済みモデルを読み出し param = torch.load('nn_dict.model') model.load_state_dict(param) # 学習済みモデルの評価 from sklearn.metrics import classification_report pred = [] y_res = [] for index, (x, y) in enumerate(testloader): with torch.no_grad(): x = x.view(-1, 28*28) #torch.Size([100, 784]) output = model(x) pred += [int(l.argmax()) for l in output] y_res += [int(l) for l in y] print(classification_report(y_res, pred)) from sklearn.metrics import confusion_matrix print(confusion_matrix(y_res, pred)) # 画像分類結果出力 import matplotlib.pyplot as plt %matplotlib inline plt.figure(figsize=(32, 32)) plt.subplots_adjust(wspace=0.2, hspace=0.7) image_pos = 0 cnt_disp = 30 col = 5 row = int(cnt_disp / col) + 1 data_iter = iter(testloader) images, labels = data_iter.next() for index, image in enumerate(images): if image_pos < cnt_disp: image = image.numpy() image = image.reshape((28, 28)) plt.subplot(row, col, image_pos + 1) plt.imshow(image) image_pos += 1 # 正解の場合は青、不正解の場合は赤 if pred[index] == y_res[index]: color = 'blue' else: color = 'red' plt.xlabel("y^->{}, y->{}".format(pred[index], y_res[index]), color=color, fontsize=18) |
CNNモデルのソースコード
|
1 2 3 4 5 6 7 8 9 10 11 12 13 14 15 16 17 18 19 20 21 22 23 24 25 26 27 28 29 30 31 32 33 34 35 36 37 38 39 40 41 42 43 44 45 46 47 48 49 50 51 52 53 54 55 56 57 58 59 60 61 62 63 64 65 66 67 68 69 70 71 72 73 74 75 76 77 78 79 80 81 82 83 84 85 86 87 88 89 90 91 92 93 94 95 96 97 98 99 100 101 102 103 104 105 106 107 108 109 110 111 112 113 114 115 116 117 118 119 120 121 122 123 124 125 126 127 128 129 130 131 132 133 134 135 136 |
import torch import torchvision import torchvision.transforms as transforms import numpy as np import datetime device = torch.device('cuda' if torch.cuda.is_available() else 'cpu') transform = transforms.Compose([transforms.ToTensor(), transforms.Normalize((0.5, ), (0.5, ))]) trainset = torchvision.datasets.MNIST(root='./data', train=True, download=True, transform=transform) trainloader = torch.utils.data.DataLoader(trainset, batch_size=100, shuffle=True, num_workers=2) testset = torchvision.datasets.MNIST(root='./data', train=False, download=True, transform=transform) testloader = torch.utils.data.DataLoader(testset, batch_size=100, shuffle=False, num_workers=2) classes = tuple(np.linspace(0, 9, 10, dtype=np.uint8)) # モデルの学習 def fn_train(model, epoch, optimizer, train_loader, criterion=nn.CrossEntropyLoss()): total_loss = 0 total_size = 0 model.train() for batch_idx, (data, target) in enumerate(train_loader): data, target = data.to(device), target.to(device) # print(data.shape) #torch.Size([100, 1, 28, 28]) # data = data.view(-1, 28*28) #torch.Size([100, 784]) optimizer.zero_grad() output = model(data) loss = criterion(output, target) total_loss += loss.item() total_size += data.size(0) loss.backward() optimizer.step() if batch_idx % 1000 == 0: now = datetime.datetime.now() print('[{}] Train Epoch: {} [{}/{} ({:.0f}%)] Average loss: {:.6f}'.format(now, epoch, batch_idx*len(data), len(train_loader.dataset), 100. * batch_idx / len(train_loader), total_loss / total_size)) from torch import nn import torch.nn.functional as F import torch.optim as optim # CNNモデル定義 class cnnNet(nn.Module): def __init__(self): super(cnnNet, self).__init__() self.conv1 = nn.Conv2d(1, 32, 3) # 28*28*1 -> 26*26*32 self.pool1 = nn.MaxPool2d(2, 2) # 26*26*32 -> 13*13*32 self.conv2 = nn.Conv2d(32, 64, 3) # 13*13*32 -> 11*11*64 self.pool2 = nn.MaxPool2d(2, 2) # 11*11*64 -> 5*5*64 self.conv3 = nn.Conv2d(64, 64, 3) # 5*5*64 -> 3*3*64 self.fc1 = nn.Linear(3*3*64, 64) self.fc2 = nn.Linear(64, 10) def forward(self, x): x = self.pool1(F.relu(self.conv1(x))) x = self.pool2(F.relu(self.conv2(x))) x = F.relu(self.conv3(x)) x = x.view(-1, 3*3*64) x = F.relu(self.fc1(x)) x = F.log_softmax(self.fc2(x)) return x model = cnnNet() # 損失関数の定義 criterion = nn.CrossEntropyLoss() # 最適化関数の定義 optimizer = optim.Adam(model.parameters(), lr=0.01) # モデルの学習 for epoch in range(1, 4): fn_train(model=model, epoch=epoch, optimizer=optimizer, train_loader=trainloader, criterion=criterion) # 学習済みモデルの保存 torch.save(model.state_dict(), 'cnn_dict.model') torch.save(model, 'cnn.model') # 保存した学習済みモデルを読み出し param = torch.load('cnn_dict.model') model.load_state_dict(param) # 学習済みモデルの評価 from sklearn.metrics import classification_report pred = [] y_res = [] for index, (x, y) in enumerate(testloader): with torch.no_grad(): # x = x.view(-1, 28*28) #torch.Size([100, 784]) output = model(x) pred += [int(l.argmax()) for l in output] y_res += [int(l) for l in y] print(classification_report(y_res, pred)) from sklearn.metrics import confusion_matrix print(confusion_matrix(y_res, pred)) # 画像分類結果出力 import matplotlib.pyplot as plt %matplotlib inline plt.figure(figsize=(32, 32)) plt.subplots_adjust(wspace=0.2, hspace=0.7) image_pos = 0 cnt_disp = 30 col = 5 row = int(cnt_disp / col) + 1 data_iter = iter(testloader) images, labels = data_iter.next() for index, image in enumerate(images): if image_pos < cnt_disp: image = image.numpy() image = image.reshape((28, 28)) plt.subplot(row, col, image_pos + 1) plt.imshow(image) image_pos += 1 # 正解の場合は青、不正解の場合は赤 if pred[index] == y_res[index]: color = 'blue' else: color = 'red' plt.xlabel("y^->{}, y->{}".format(pred[index], y_res[index]), color=color, fontsize=18) |
ディープラーニングの発展・応用手法のアイディアを与えてくれつつ、Pytorchの利用方法も知ることができる本があります。
下記のタスクにおける深層ニューラルネットワークモデルの定義を確認することができます。
- 転移学習、ファインチューニング:少量の画像データからディープラーニングモデルを構築
- 物体検出(SSD): 画像の物体の位置とカテゴリを検出
- セマンティックセグメンテーション(PSPNet): ピクセルレベルで画像内の物体を検出
- 姿勢推定(OpenPose): 人物を検出し、人体の各部位を同定する
- GAN(DCGAN, Self-Attention GAN): 現実に存在しないリアルな画像を生成
- 異常検知(AnoGAN, Efficient GAN): 正常画像のみからGANで異常画像を検出
- 自然言語処理(Transformer, BERT): テキストデータの感情分析を実施
- 動画分類(3DCNN, ECO): 人物動作の動画データをクラス分類
各タスクのサンプルコードがGithubにて公開されていますので、
こちらを参考にしつつ、内容が気になるという方は本を手に取ってみてはいかがでしょうか。
- https://github.com/YutaroOgawa/pytorch_advanced


